To avoid shutdowns and melted GPU connectors, choose a PSU that matches your GPU's transient spikes, supports the correct PCIe/12VHPWR cabling, and uses original, properly seated connectors with safe bend radius. Favor ATX 3.0/PCIe 5.0 units for new high-end cards, verify wattage headroom, and test under load before daily use.
Essential Criteria for PSU and Cable Compatibility
- Pick a PSU with enough continuous wattage and transient response (ATX 3.0 is the simplest way to cover this).
- Use the right connector type (native 12VHPWR/12V-2x6 when available) and avoid unknown adapters.
- Use original PSU cables only; modular cables are not cross-brand compatible even if they "fit".
- Confirm the GPU power path: number of PCIe 8-pin outputs, rail limits, and connector seating depth.
- Plan cable routing: no sharp bends near the plug; strain relief must not pull the connector out.
- Validate with a controlled load test and basic monitoring (12V stability, connector heat, event logs).
Understanding Power Draw of Modern GPUs
This guide is for intermediate PC builders upgrading to modern GPUs with higher transient spikes and newer connectors (especially 12VHPWR / 12V-2x6). It's most relevant if you're trying to ซื้อ PSU สำหรับการ์ดจอรุ่นใหม่ and you've seen random reboots, black screens under load, or you're moving to RTX 40/50-class power cabling.
Do not proceed if your PSU shows burning smell, browned plastic at connectors, intermittent arcing sounds, or damaged pins-stop and replace the PSU/cable set first. If you're uncomfortable working inside a PC, have a shop in Thailand handle the installation and stress test.
Choosing the Right Wattage and Headroom
Prepare the following before buying or rewiring:
- Your exact GPU model and its required connectors (e.g., 1×12VHPWR vs 3-4×8-pin via adapter).
- CPU model and whether you use PBO/overclocking (raises spikes and sustained draw).
- PSU model and age (older units can degrade; protection thresholds may trip earlier).
- Tools: Phillips screwdriver, flashlight, zip ties/Velcro, optional IR thermometer, optional multimeter.
- Access: PSU box and spare cables (only those shipped with that PSU).
| Build profile (typical) | Practical PSU target | Why this range helps | What to prioritize when comparing "PSU 850W 80 Plus Gold ราคา" |
|---|---|---|---|
| Midrange GPU + mainstream CPU | Quality 650-750W | Maintains headroom for spikes and quieter fan curves | Protections (OCP/OVP/OTP), reputable platform, adequate PCIe outputs |
| High-end GPU (12VHPWR) + strong CPU | Quality 850-1000W | Reduces nuisance shutdowns from transient loads | Native 12VHPWR/12V-2x6 cable, ATX 3.0 labeling, solid connector quality |
| Flagship GPU + heavy CPU workloads/OC | Quality 1000W+ | Extra margin for sustained render loads and peak spikes | ATX 3.0/PCIe 5.0 compliance, multiple PCIe ports, robust thermal design |
If you're specifically asking PSU ATX 3.0 PCIe 5.0 ซื้อที่ไหน, focus less on "wattage only" and more on native PCIe 5.x GPU cabling, warranty support in Thailand, and verified distributor stock (to avoid counterfeit cables).
Connector Types, Pinouts and Cable Quality
-
Identify what the GPU truly needs (native vs adapter).
Check the GPU manual/box for its power input: some cards take 1×12VHPWR/12V-2x6, others take 2-3×8-pin. If the card includes an adapter, treat it as a last resort, not the default.
- If your PSU has a native 12VHPWR/12V-2x6 cable, prefer it over multi-8-pin adapters.
- If you must use an adapter (e.g., สายแปลง 12VHPWR 16 pin สำหรับ RTX 4090), use the GPU-included adapter or a reputable, correctly-rated one-no unbranded marketplace cables.
-
Confirm PSU-side modular compatibility (do not mix cables).
Modular PSU ports are not standardized across brands or even across model lines. Using "fits physically" cables can miswire 12V/ground/sense and destroy hardware.
- Only use cables that shipped with that exact PSU model/series.
- When buying replacements, buy from the PSU brand with the exact compatibility list-this matters more than สายไฟการ์ดจอ 12VHPWR แท้ ราคา.
-
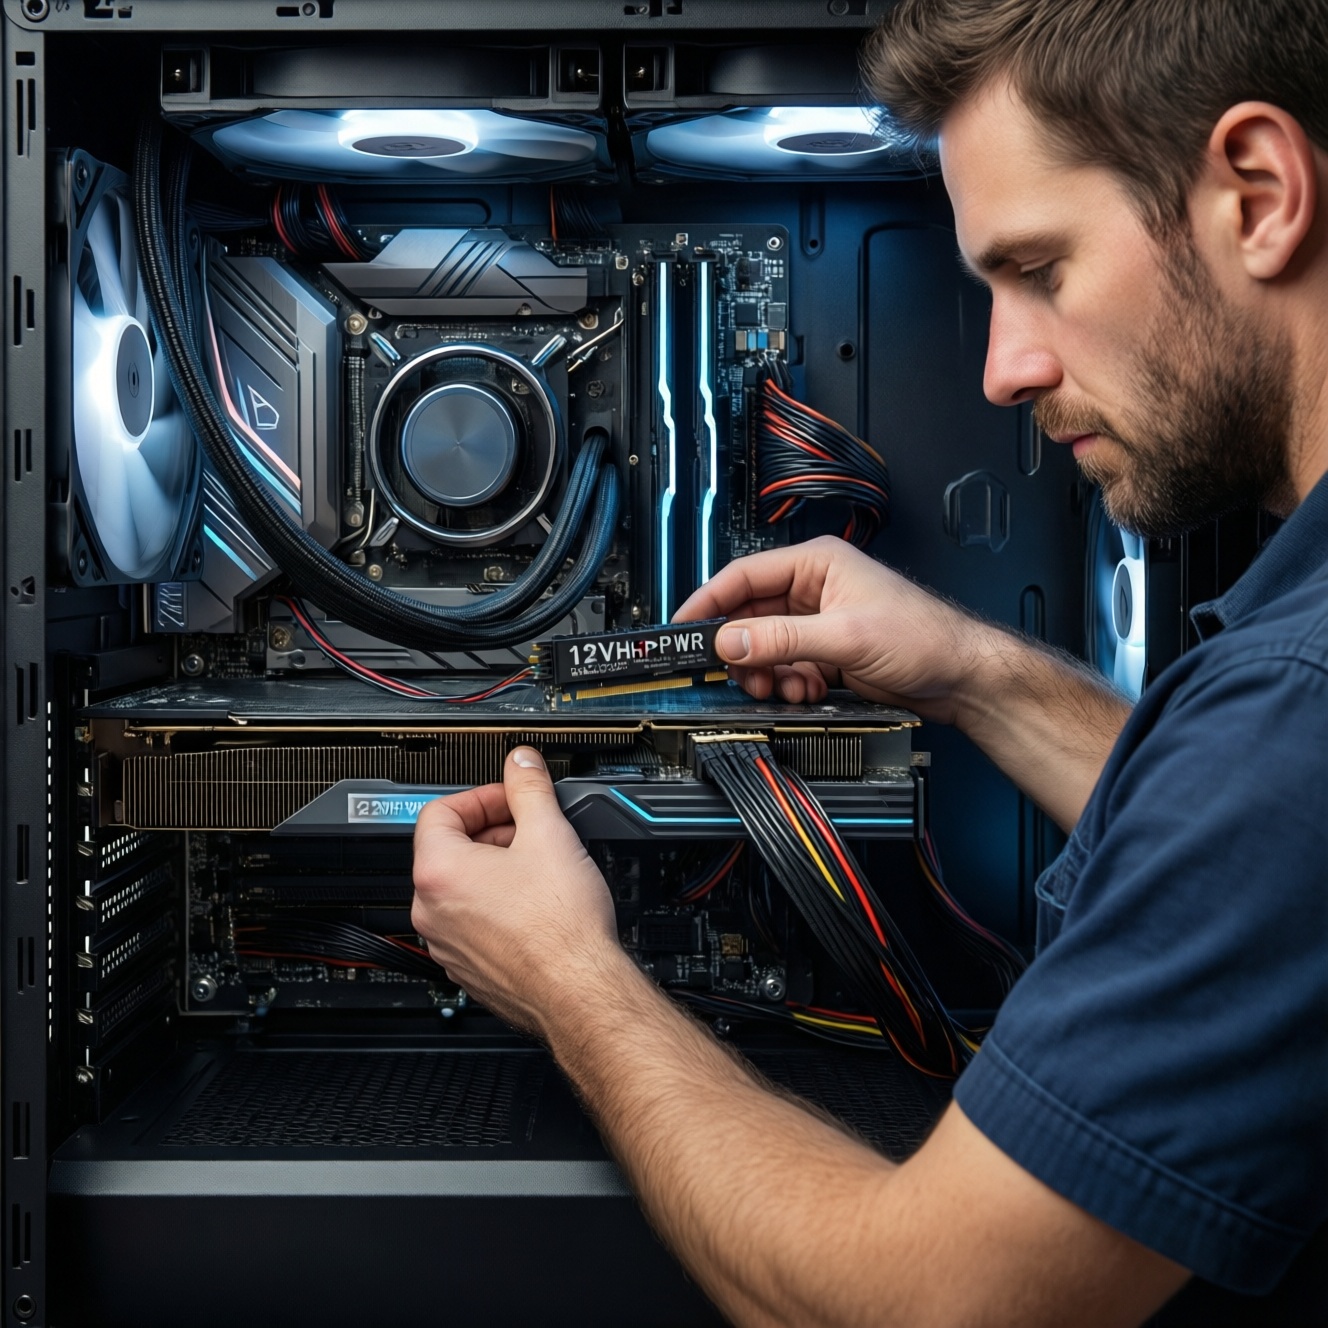
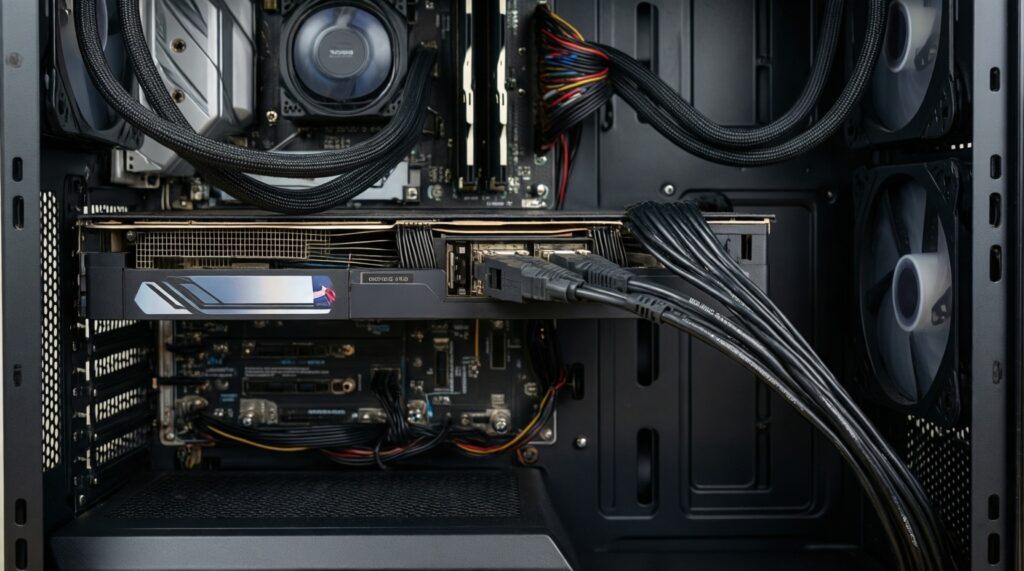
Check the connector generation and seating depth.
For 12VHPWR/12V-2x6, partial insertion is a major cause of overheating. Seat the plug fully until it stops; then gently pull back to confirm it's locked and not creeping out under tension.
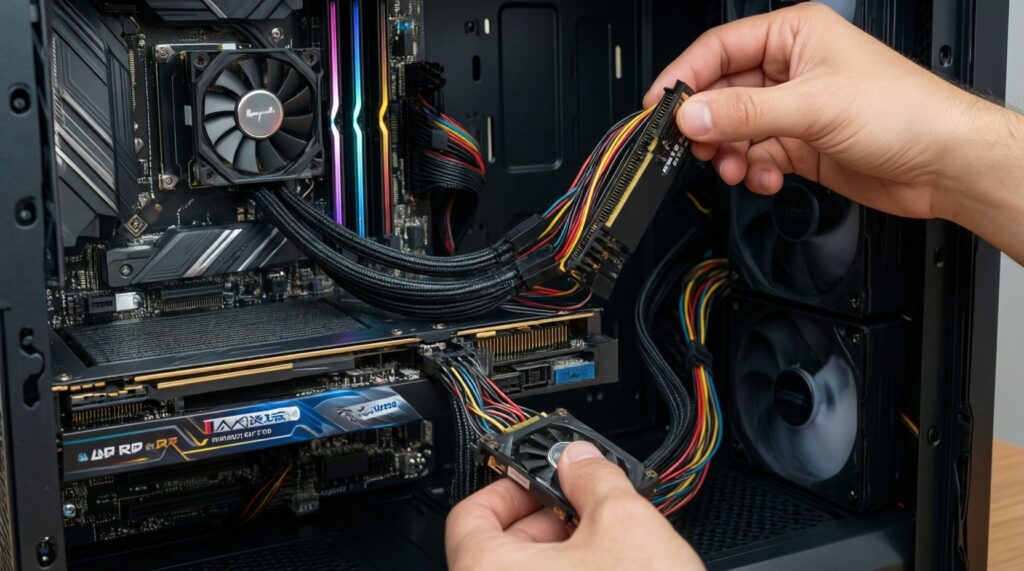
- Route the cable first, then plug in, so the cable doesn't "lever" the connector out.
- After closing the case, re-check that the connector is still fully seated.
-
Respect electrical limits and basic spec checks.
ATX 12V should typically stay within about 11.4-12.6V (±5%). For 12VHPWR-class connectors, treat heat as a warning: if the plug becomes hot to touch or an IR reading trends abnormally high at the housing, stop and inspect seating and cable quality.
- If you see discoloration, warping, or a "sweet/burnt plastic" smell: power down immediately and replace the affected parts.
- Prefer thicker, flexible cable runs that don't force tight bends at the connector.
-
Choose the safer buying path (ATX 3.0 + native cable).
When comparing options like PSU 850W 80 Plus Gold ราคา, prioritize units that include a native GPU cable in the box and list ATX 3.0/PCIe 5.0 support. This reduces adapter stacking and lowers failure points.
Быстрый режим
- Buy an ATX 3.0/PCIe 5.0 PSU with a native 12VHPWR/12V-2x6 cable (avoid random adapters).
- Use only the PSU's original modular cables; never mix cables between PSU brands/models.
- Route the GPU cable with a gentle bend; plug it in last and confirm full seating/lock.
- Load-test (game/benchmark) and feel-check/IR-check the connector area; shut down if it heats unusually or smells.
| GPU power option | Best use case | Main risk | Practical rule |
|---|---|---|---|
| Native 12VHPWR / 12V-2x6 from ATX 3.0 PSU | New GPUs designed for 16-pin | Poor seating or sharp bend near plug | Seat fully; avoid tight bends close to the connector |
| GPU-included multi-8-pin to 16-pin adapter | When PSU lacks native 16-pin cable | Extra connection points, uneven load if not all 8-pins are used | Populate all required 8-pin inputs; use separate PSU PCIe cables per 8-pin when possible |
| Third-party 16-pin adapter/cable | Only if brand is trusted and correctly rated | Unknown pinout/quality; counterfeit risk | Verify authenticity and compatibility; avoid "too cheap" listings |
Modular vs Non‑Modular PSUs: Practical Tradeoffs
- All GPU/CPU power cables you installed are from the same PSU's box (no mixed modular cables).
- The GPU connector is fully seated and does not back out when you gently tug the wire bundle.
- No cable is under tension; the side panel closes without pushing on the GPU plug.
- You used the correct number of PCIe feeds (no missing 8-pin inputs on adapters).
- PSU PCIe outputs are not daisy-chained in a way that overloads a single cable run.
- System is stable under a 15-30 minute combined load (game + CPU workload) without black screens.
- After load, the connector area shows no odor, discoloration, or abnormal heat.
Proper Cabling Practices to Prevent Overheating
- Using a "compatible-looking" modular cable from another PSU brand/model.
- Leaving a 12VHPWR/12V-2x6 plug partially inserted because the latch "seems" engaged.
- Making a sharp bend immediately at the connector (the cable should curve gradually).
- Letting the side panel press the cable inward, slowly unseating the plug over time.
- Using split/daisy-chain PCIe connectors for high draw when separate cable runs are available.
- Stacking adapters (PSU 8-pin → extension → adapter → GPU). Every junction adds resistance and heat risk.
- Routing GPU power cables across hot zones (VRM heatsinks, radiator exhaust) without securing them.
- Buying suspiciously cheap "original" listings when searching สายไฟการ์ดจอ 12VHPWR แท้ ราคา-counterfeits are a real safety risk.
Testing, Monitoring and Safe Installation Steps
Use these alternatives depending on your constraints:
- Choose an ATX 3.0 PSU upgrade instead of adapters. Best when you're moving to 16-pin GPUs and want the cleanest failure-resistant path.
- Undervolt the GPU to reduce spikes and heat. Useful if you can't replace the PSU immediately; validate stability with your usual games/workloads.
- Limit power target / frame rate. A quick mitigation for shutdowns while you source a better PSU/cable set in Thailand.
- Have a qualified shop perform a load test and cable inspection. Appropriate if you suspect counterfeit cables, connector damage, or you're unsure about correct routing.
Quick Solutions to Common Power and Cable Failures
My PC shuts down only during gaming-what should I check first?
Confirm the GPU power connector is fully seated and not being pushed by the side panel. Then check you're not using mixed modular PSU cables and that all adapter inputs are populated.
Is ATX 3.0/PCIe 5.0 mandatory for new GPUs?
Not mandatory, but it simplifies compatibility because it's designed for modern transient behavior and often includes a native 12VHPWR/12V-2x6 cable. If you're asking PSU ATX 3.0 PCIe 5.0 ซื้อที่ไหน, prioritize official channels for warranty and authenticity.
Can I reuse my old PCIe cables with a new modular PSU?
No. Modular PSU pinouts are not standardized; reusing old cables can miswire power and damage hardware. Use only the cables that shipped with the new PSU or brand-approved replacements.
My 12VHPWR connector feels warm-when is it dangerous?
If it becomes hot to touch, smells like heated plastic, or shows discoloration/warping, shut down immediately and inspect seating and cable quality. Do not continue stress testing until the cause is fixed.
Is a third-party 16-pin cable safer than an adapter?
Only if it's a verified, model-specific cable from a reputable brand and explicitly compatible with your PSU. Random marketplace options-even if marketed as สายแปลง 12VHPWR 16 pin สำหรับ RTX 4090-are a common risk point.
How should I compare deals like "PSU 850W 80 Plus Gold ราคา"?
Compare included native GPU cables, ATX 3.0 labeling, protections, and distributor warranty support-not just efficiency badges. A slightly higher price can be worth it if it eliminates adapters and cable uncertainty.
What's the safest way to install the GPU power cable to avoid partial insertion?
Route the cable first, then plug it in straight with no tension, and re-check seating after closing the case. If the cable must bend, ensure the bend starts away from the connector housing.